
There is no universal pressure, temperature and cycle time that should be copied across every OCA adhesive, LCD/OLED stack, panel size, loading quantity and bubble remover machine. A reliable recipe is a verified process window. Start with the actual material and panel, stay inside their limits, establish a baseline, change one variable at a time and confirm that the result can be reproduced under the same loading condition. The goal is not to find the highest pressure or longest cycle. It is to find a controlled setting that works repeatedly for a defined product family.
A practical settings-development sequence
Material, panel stack, dimensions, defect and load.
Adhesive guidance, machine manual and safety limits.
Change one process variable while holding the others steady.
Repeat the candidate recipe before releasing it for routine use.
Define the Screen, Adhesive and Load Before Setting the Machine
The numbers on the control panel are only part of the process. A pressure setting means little unless it is connected to a specific adhesive, panel construction, loading quantity and cycle sequence. When one of those conditions changes, the previous recipe becomes a reference rather than an automatically approved production setting.
This matters in both repair centers and production environments. A workshop may process phones, tablets and industrial displays in the same week. A production line may run one display family repeatedly but increase the number of assemblies per batch. In both cases, the machine can show the same values while the real process condition has changed.
Record the actual OCA or optical bonding material and the technical information supplied for it.
Identify the LCD/OLED assembly, cover layer and other bonded layers relevant to the process.
Use assembled width and height rather than relying only on the diagonal screen size.
Record whether the visible defect is at an edge, local to one point or distributed across the panel.
Record quantity, orientation, shelf or fixture support and position inside the chamber.
Confirm the operating sequence, available controls and applicable limits for the actual equipment.
Loading deserves particular attention. A cycle developed with one screen placed alone in the chamber has not automatically been validated for several panels distributed across multiple shelves. If routine production will use a denser loading pattern, that condition should be part of the trial instead of being introduced after the recipe is approved.
Once the process requirements are clear, compare the capabilities of the available LCD/OCA autoclave equipment. The useful comparison is whether the machine can control and reproduce the pressure, temperature, timing and loading method your application actually requires—not whether another operation uses the same displayed numbers.
Pressure, Temperature and Time Should Be Treated as One Process Window
The three values operators notice first are pressure, temperature and time. They are important, but they should not be separated from the way the machine reaches the target condition, how long that condition is held and how the load exits the cycle.
One part of the external condition applied to the laminated display.
Must remain appropriate for the actual adhesive and panel stack.
Defines how long the intended process condition is maintained.
Determines how the process approaches and leaves its working condition.
Pressure is not a universal cure for visible bubbles
A remaining void does not prove that the bubble remover pressure setting is too low. If a defect is associated with contamination, incorrect lamination, physical damage or another fixed condition, raising pressure does not remove that cause. Pressure becomes a useful trial variable only after the incoming laminate is suitable for post-lamination bubble removal and the other relevant conditions can be held steady.
When testing pressure, the useful evidence is not simply that one panel looked better. The stronger evidence is that otherwise comparable panels show a consistent response when that one variable changes.
Temperature must follow the adhesive and display system
OCA bubble remover temperature should be selected within the guidance and limits for the actual material and display construction. Two optical adhesives can have different behavior even when they are used for visually similar screens. That is why a temperature copied from an unrelated application should not become the baseline for a new material without verification.
Use the adhesive supplier as a material reference. For example, 3M’s official OCA technical resources separate adhesive families and application considerations rather than presenting one universal display-bonding condition. The same principle applies regardless of adhesive brand: use the documentation for the material actually being processed.
Cycle time should be separated into meaningful stages
A longer bubble removal cycle time is not automatically a better cycle. When comparing trials, determine whether “time” refers to the entire machine cycle or the period during which the intended process condition is maintained. If the pressure ramp, heating stage or release sequence changes, two cycles with the same headline time may not represent the same process.
This becomes more important as the application moves from occasional repair work to repeated production. Operators need to know which part of the sequence was changed and why. Otherwise, a successful recipe can become difficult to reproduce after a shift change, material change or later machine adjustment.
Validate Settings With a Small Batch and One Controlled Change at a Time
A useful trial answers a specific question. “Will changing this one variable improve the defined defect under the same material and loading condition?” is a useful question. “What happens if we increase everything?” is not, because even a good-looking result does not explain which change was necessary.
Choose one panel family, one adhesive, one defined loading arrangement and one inspection method for the comparison.
Write down the programmed pressure, temperature, time, relevant stage information and the defect position before processing.
Use the same loading and inspection approach planned for the comparison. Do not make unrecorded adjustments during the run.
Investigate pressure, temperature, hold time or another defined factor separately so the result has a clear cause-and-effect relationship.
Record whether the target bubble improved and whether any new visible or process problem appeared.
A single acceptable screen shows that a condition can work once. Repeatability is what makes the setting useful for routine operation.
Why changing one variable matters: if pressure, temperature and time are all increased together, a successful result still leaves the process team unable to explain which adjustment produced the improvement. The next difficult panel then starts another cycle of guessing.
Small-batch validation also reduces the temptation to qualify a recipe from one unusually easy panel. The trial should represent the real application closely enough that a successful result can be transferred into the normal workflow with minimal additional uncertainty.
Build a trial record that another operator can reproduce
Product family, assembled dimensions and relevant display structure.
OCA or optical bonding material identification used for the run.
Quantity, orientation, shelf or fixture arrangement and chamber position.
Pressure, temperature, hold time and available stage or ramp information.
Bubble position and appearance before entering the bubble remover.
Immediate result plus any defined follow-up inspection used by the process.
This is also why OCA bubble removal settings vary by screen size and loading quantity. If the panel geometry, support method or chamber loading changes, the previous trial is no longer being reproduced under identical conditions. Keep the old recipe as useful reference data, but verify the new condition before treating it as standard.
Use the Defect Pattern to Decide Whether the Next Step Is a Settings Trial
Bubble appearance can guide the investigation, but it should not become a shortcut diagnosis. “Edge bubble means more pressure” and similar rules are too simple for a process affected by material, lamination, panel construction and loading.
Record which edge is affected, how the panel was oriented and whether the same pattern appears on several assemblies. Compare the result against alignment, support and upstream lamination conditions before assuming that the autoclave cycle is the cause.
A defect that repeatedly appears at one fixed point deserves a closer look at the incoming laminate and the same position on other panels. A fixed local pattern should not automatically trigger increases to all machine settings.
Record when the bubble becomes visible again—immediately after unloading, after cooling or at a later inspection. Compare only trials that used the same material, loading arrangement and inspection timing.
The next trial is justified when the laminate is otherwise acceptable, the test boundaries are known and the defect responds predictably to controlled process changes. If the defect follows contamination, misalignment, damage or another fixed cause, continuing to increase the cycle settings adds process intensity without addressing the actual problem.
Do Not Cross Material, Machine or Pressure-Equipment Boundaries
There is a point where optimization must stop. A poor visual result is not permission to keep increasing pressure, increasing temperature or extending hold time indefinitely. Every process trial should remain inside the verified limits and operating sequence for the material, panel and specific machine.
Stop the trial before crossing a known boundary
- Do not exceed the equipment manufacturer’s operating limits to rescue a difficult laminate.
- Do not exceed confirmed adhesive or display limits because another product tolerated different conditions.
- Do not bypass chamber-door, pressure-release, cooling or unloading procedures to shorten the cycle.
- Do not transfer operating procedures from a different machine model without checking the actual manual.
- Do not release a new recipe to routine production until the defined condition has been reproduced.
Pressure equipment may also be subject to local codes, inspection requirements and installation rules. The applicable requirements depend on the machine and jurisdiction. For general background, the ASME Boiler and Pressure Vessel Code is one recognized pressure-vessel standards framework, but the correct compliance path for a specific installation should be confirmed separately rather than assumed from a general reference.
Choose a Bubble Remover That Can Reproduce the Process You Validate
Equipment selection becomes clearer after the settings method is understood. The right question is not “Which machine has the biggest pressure number?” It is “Which chamber and control system can fit the actual panels, support the real loading method and reproduce the process window our operation intends to use?”
A small refurbishment operation, a mixed-size repair center and a display production line can all need OCA bubble removal, but they do not necessarily need the same chamber geometry or process-control depth. The following products illustrate three different directions using other machines from the JiuTu autoclave range rather than the compact models commonly shown in recent articles.
For repeatable professional workshop or batch operation
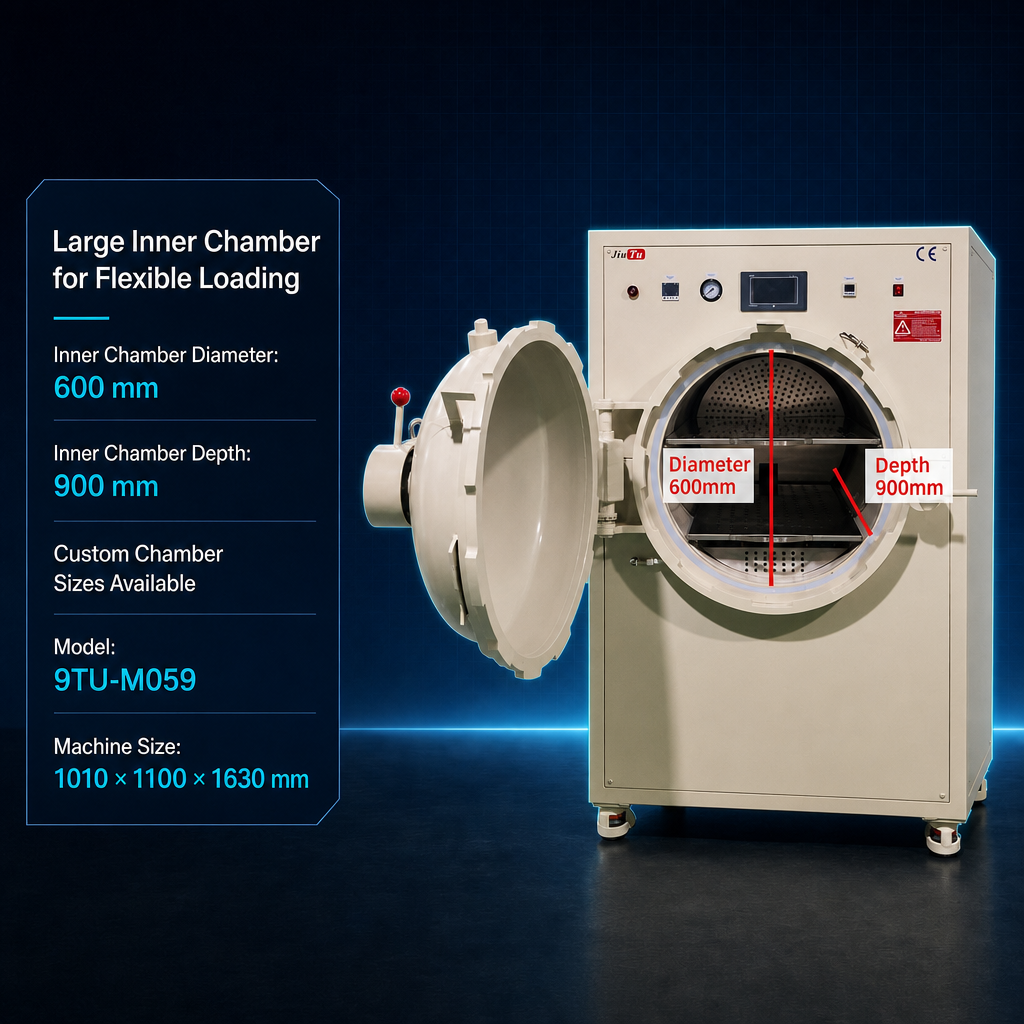
600×900mm Carbon Steel Bubble Remover Machine
This machine is a useful direction when the operation needs a larger chamber than a small repair-shop unit while still prioritizing straightforward control of pressure, temperature and working time. Its product documentation identifies PLC/touchscreen control and adjustable process parameters, which is relevant when settings must be recorded and reproduced instead of adjusted differently for every screen.
Good fit to investigate: refurbishment centers and production operations processing repeated display families or multi-panel loads where a 600 mm diameter by 900 mm depth chamber matches the real parts and fixtures.
For staged recipe development and large-format displays
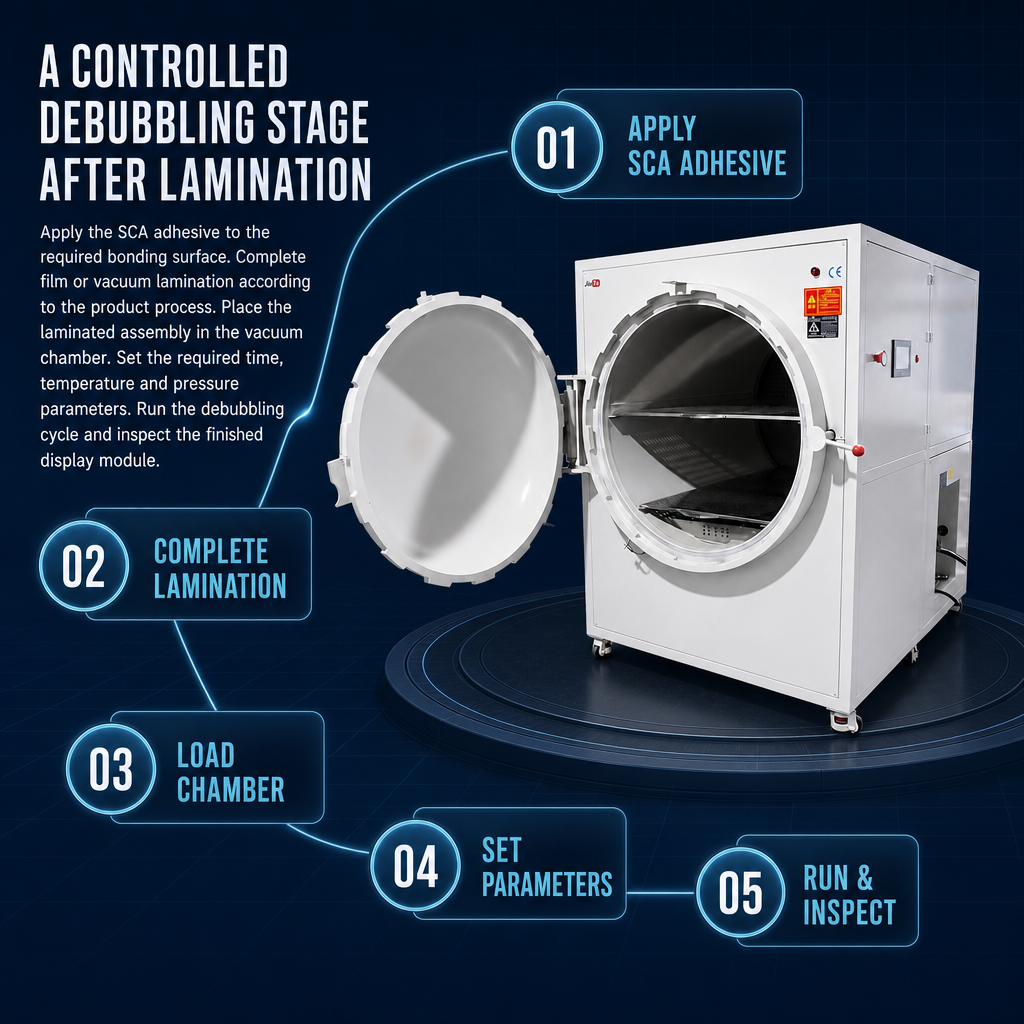
800×1200 Carbon Steel Vacuum Bubble Remover Machine
This model is especially relevant to a settings-focused article because its product documentation describes segmented recipe control in which time, temperature and pressure can be managed in stages. That type of control becomes useful when process development requires more than one simple pressure-temperature hold condition.
Its wide chamber format is also intended for larger display assemblies, so the machine makes more sense when real panel dimensions drive the purchase rather than when the goal is simply to increase the number of small parts per batch.
Good fit to investigate: operations handling larger flat, industrial or custom-format displays and engineers who need staged process control for defined product families.
For documented repeated production
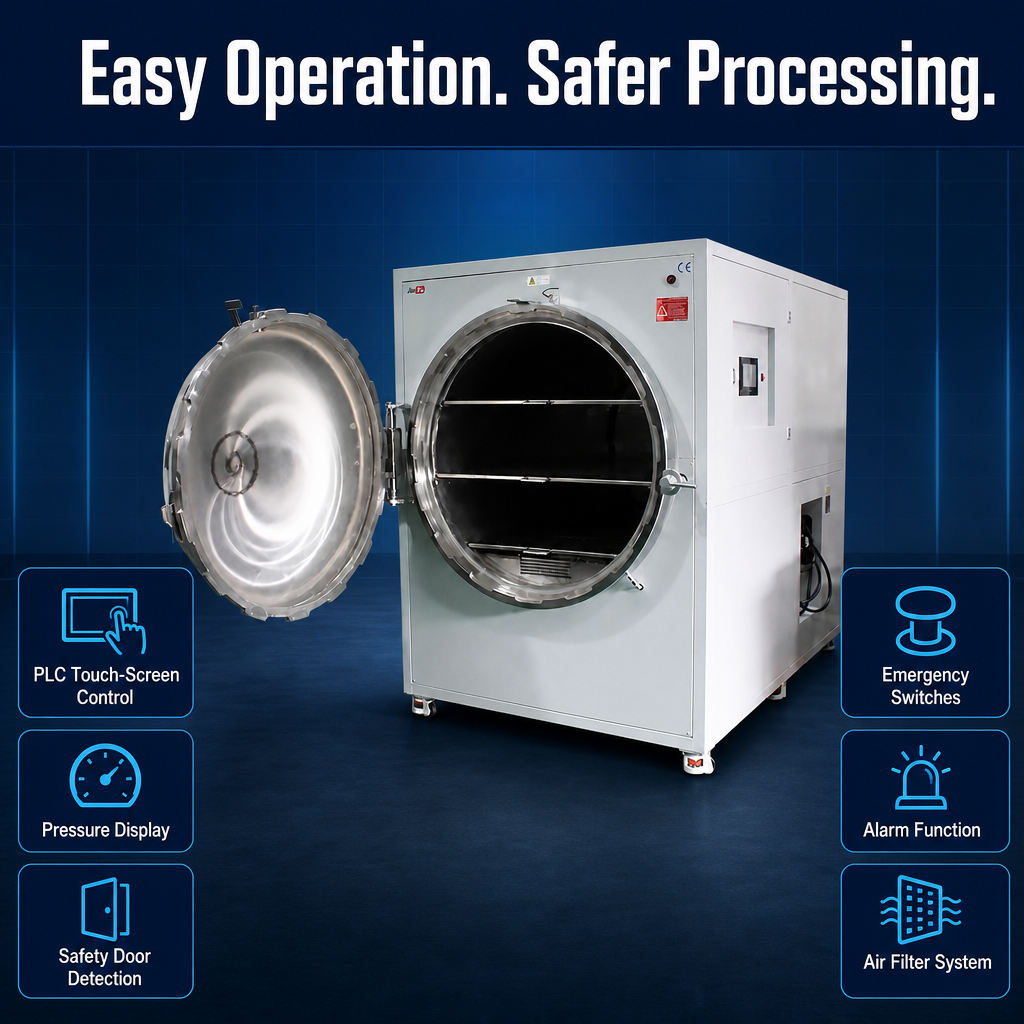
1000×1600 Stainless Steel Bubble Remover Machine
This larger stainless configuration is more relevant when the operation is already thinking beyond one successful trial and toward repeatable production. Its product information emphasizes staged process control, recipe repeatability and run records—features that matter when several product families or repeated batches must be processed consistently over time.
A chamber this size should not be selected simply because it is larger. The justification should come from real module dimensions, shelf loading, production volume and the need for a deeper documented process.
Good fit to investigate: larger display production, repeated optical-bonding batches and engineering teams that need process records and controlled recipe management.
What to confirm before requesting a quotation
- Maximum assembled panel width and height
- LCD, OLED or other display structure
- OCA or other optical bonding material
- Typical panels or fixtures loaded per cycle
- Current defect pattern and process stage
- Expected daily or batch output
- Need for staged recipes or process records
- Voltage, destination and installation conditions
There is no benefit in paying for unused chamber capacity if the normal work is much smaller. Conversely, a machine becomes restrictive when the real panel, fixture or loading arrangement is already close to its usable space. Measure the actual assembly and describe how it will be loaded before comparing models.
The same applies to control features. A basic operation running a limited number of stable product families may not need the same recipe-management depth as a production environment processing multiple display structures. Upgrade the control requirement when it solves a real repeatability or documentation problem, not simply because more settings are available.
Frequently Asked Questions
What pressure should be used for OCA bubble removal?
There is no responsible universal pressure value for every OCA, panel stack and machine. Start with the actual material and equipment limits, establish a controlled baseline and validate pressure as one variable inside the complete process window.
Can a longer cycle always remove more bubbles?
No. Longer time is another process change, not an automatic improvement. Evaluate it together with pressure, temperature, ramp, hold, release sequence and the material limits. If the defect is caused by contamination, misalignment or damage, extending the cycle does not remove the cause.
Why do settings change when panel size or loading quantity changes?
Panel dimensions, support and chamber loading are part of the defined process condition. When those inputs change, the previous recipe is no longer being reproduced under identical circumstances. Treat the old recipe as reference data and validate the new load before standardizing it.
What should be recorded during an OCA settings trial?
Record the panel and stack, adhesive identification, dimensions, loading quantity and arrangement, pressure and temperature settings, relevant stages or ramp information, hold time, pre-cycle defect and the result at a defined inspection point. Another operator should be able to understand and repeat the same trial from the record.
Application & configuration review
Turn the Trial Record Into an Equipment Requirement
Reliable OCA bubble removal settings do not come from copying three numbers from another screen. They come from defining the application, respecting material and machine boundaries, changing one variable at a time and confirming that the successful condition can be reproduced.
Once that method is established, equipment selection should follow the same logic. Choose a chamber that fits the real assemblies and loading plan, then confirm that its controls can reproduce the process your operators need to run. The machine should make the verified process easier to repeat—not become a substitute for validation.
For a useful configuration review, send the information that actually changes the equipment decision:
- Maximum panel or sample dimensions
- LCD/OLED and bonded stack structure
- OCA or other bonding material
- Bubble location or defect photographs
- Current pressure-temperature-time process
- Typical loading and expected output
- Required voltage
- Destination and installation conditions
With those details, the equipment discussion can focus on chamber fit, loading, control method and process repeatability instead of choosing a machine from one specification or an unverified recipe.